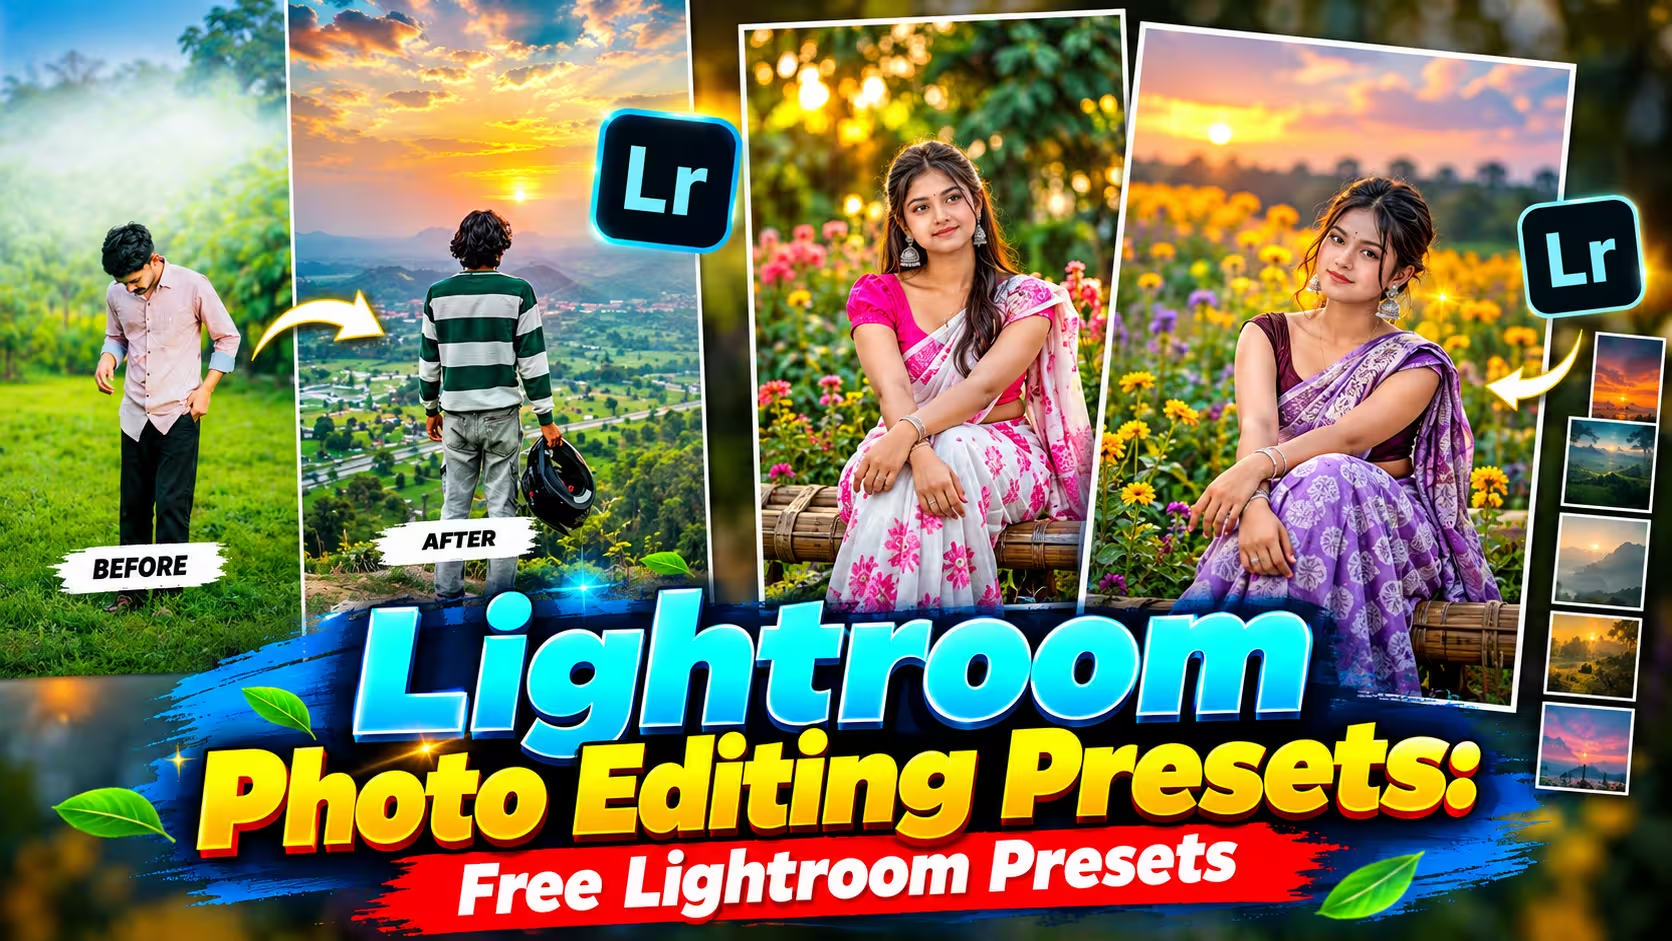
Free Lightroom Photo Editing Presets 2026: Cinematic & Santali Presets
Lightroom Photo Editing Presets are a simple way to give your photos a fresh and polished look without spending a lot of time editing every setting manually. Whether you are creating Instagram posts, Facebook photos, WhatsApp pictures, or portraits for your personal collection, a good Lightroom preset can save you plenty of editing time.
Instead of adjusting exposure, contrast, highlights, shadows, colors, skin tones, and other settings from the beginning, you can start with a ready-made preset and then make a few small changes according to your photo.
In this guide, you will learn how Lightroom Photo Editing Presets work, how to use DNG presets on mobile, how to create cinematic and Santali-style edits, and how to adjust a preset when the colors or brightness don’t look quite right.
Table of Contents
- What is Lightroom Mobile and How It Works
- How Does Lightroom Work?
- What Are Lightroom Photo Editing Presets?
- Santali Lightroom Presets and Other Popular Editing Styles
- The Magic of 1-Click Photo Editing
- Key Features of Lightroom Presets
- How to Add and Use a Lightroom Preset on Mobile Step-by-Step
- How to Copy Settings From a DNG Preset
- How to Apply the Preset to Your Own Photo
- How to Adjust a Preset for the Perfect Result
- Understanding Important Lightroom Editing Tools
- Instagram Viral Santali Profile Photo Editing AI Prompt
- How to Get and Use Lightroom Presets
- Tips for Getting Better Results With Lightroom Presets
- Frequently Asked Questions
- Conclusion
What is Lightroom Mobile and How It Works
Lightroom Photo Editing Presets are especially useful when you want to create a similar editing style across multiple photos without starting from scratch every time.
For instance, if a picture is too dark, you can raise the exposure. If the colors feel flat, you can increase vibrance or saturation. When the image needs more depth, adjusting contrast, highlights, shadows, and related settings can help.That’s one reason Lightroom is so useful for photographers, creators, Instagram users, and anyone who wants their everyday photos to look a little better.
How Does Lightroom Work?
The basic workflow is easy to follow.First, import a photo into Lightroom. Then open the editing controls and start adjusting the settings based on the look you’re trying to create.Some of the tools you’ll use most often are:
Light, Exposure, Contrast, Highlights, Shadows, Whites, Blacks, Color, Temperature, Tint, Vibrance, Saturation, Effects, Texture, Clarity, Dehaze, Vignette, and Detail.
The good news is that you don’t have to change all of these by hand every time.That’s where a preset comes in.
What Are Lightroom Photo Editing Presets?
A Lightroom preset is simply a saved group of editing adjustments.
Think about editing one photo until you finally get a look you really like. Maybe you adjusted the brightness, contrast, colors, shadows, highlights, skin tones, and several other controls.Instead of trying to remember those settings and rebuilding the same look for another photo, you can save them as a preset.
When you need that style again, you can apply it to another image in just a few taps.That’s the basic idea behind Lightroom presets.Presets come in all kinds of styles, including:
- Cinematic Lightroom Presets
- Natural Lightroom Presets
- Portrait Lightroom Presets
- Dark Tone Presets
- Bright & Clean Presets
- Wedding Presets
- Travel Presets
- Instagram Presets
- Skin Tone Presets
- Santali Photo Editing Presets
- Moody Color Presets
One thing to keep in mind is that a preset won’t automatically make every photo look perfect. Different pictures can have different lighting, camera settings, skin tones, backgrounds, and original colors.
So, after applying a preset, you may still need to make a few manual adjustments.
Santali Lightroom Presets and Other Popular Editing Styles
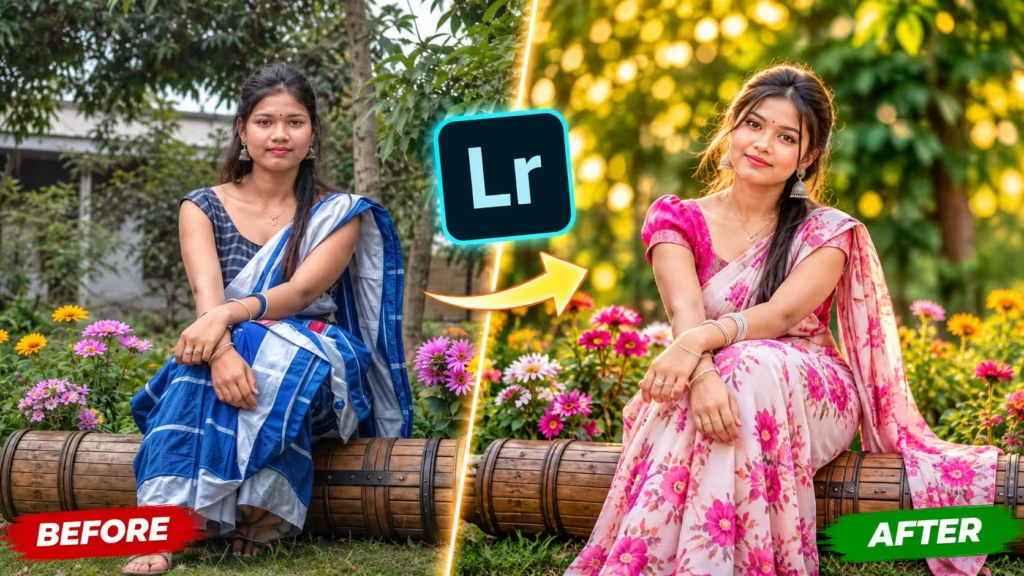
Santali photo editing has become popular with creators who want portraits with a distinctive traditional or social-media-inspired look.You can create a Santali-style edit by working with suitable colors, contrast, skin tones, background treatment, and overall color grading.The same basic Lightroom workflow works for many other styles too.
For example, a cinematic preset can give an image a richer, more dramatic feel, while a natural preset can keep the colors closer to what was captured in the original photo.The key isn’t just to apply a preset and immediately export the image. It’s worth paying attention to what the preset is actually changing.
Suppose your photo is already bright and the preset was made for a darker image. The result could look too bright or washed out. In the same way, a preset designed for warm lighting may look different on a photo taken under cooler light.It’s better to think of a preset as a starting point rather than a complete replacement for editing.
The Magic of 1-Click Photo Editing
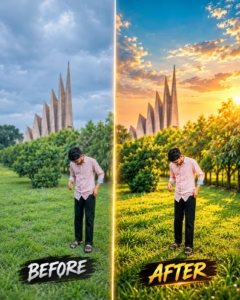
This is one of the biggest reasons presets are so popular.
When you edit manually, you might spend several minutes working through different sliders. With a good preset, much of the basic color grading is already there.A simple workflow can look like this:
Import photo → Apply preset → Check exposure → Adjust colors → Export
That’s the general idea.You can use the same preset across several photos and then make small adjustments to each one.For example, if you’re editing pictures from the same trip, wedding, event, or photoshoot, using a similar preset can help the whole set feel more consistent.
Key Features of Lightroom Presets
Depending on the preset, you may get benefits such as:
- Quick one-tap editing
- Easy mobile workflow
- DNG-based preset support
- Cinematic color grading
- Portrait-friendly color tones
- Natural-looking results
- Social-media-ready editing
- Adjustable settings
- Beginner-friendly workflow
- Time-saving editing
- Consistent colors across multiple photos
- Easy import and copy-paste workflow
The final look will still depend on both the preset and the original photo.
How to Add and Use a Lightroom Preset on Mobile Step-by-Step
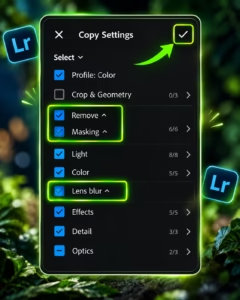
If you’ve never used a Lightroom preset before, this is the part you’ll probably want to follow closely.
The steps below use the common DNG preset workflow for Lightroom mobile editing.
Step 1: Install Lightroom
Start by installing the Adobe Lightroom mobile app on your Android phone or iPhone.
After installing it, open the app and sign in if Lightroom asks you to.
Step 2: Import Your Original Photo
Next, add the photo you want to edit to Lightroom.
Try to start with an image that has decent lighting. A preset can improve colors and grading, but it can’t completely rescue a photo that is badly exposed or extremely blurry.
Step 3: Import the DNG Preset
Now import the DNG preset file into Lightroom in the same way you would add a normal photo.
A DNG preset can look like an ordinary image when you first open it, but the file can contain the editing settings associated with that preset.
Open the DNG file inside Lightroom.
Step 4: Open the Preset DNG
Select the DNG preset image and enter the editing screen.
You should be able to view the settings that were used for the preset.
Don’t worry if the DNG image itself doesn’t seem especially useful as a picture. Its main job in this workflow is to carry the editing settings.
Step 5: Copy the Settings
Tap the three-dot menu in the Lightroom editing interface.
Find Copy Settings.
Choose the settings you want to copy, then confirm.
At this point, Lightroom has copied the preset’s editing adjustments.
Step 6: Open Your Own Photo
Return to your Lightroom library and open the photo you actually want to edit.
Tap the three-dot menu again.
This time, select Paste Settings.
Lightroom will apply the copied adjustments to your photo.
And you’re done.
Your image should now have the basic look of the preset.
How to Copy Settings From a DNG Preset
The DNG workflow is especially handy when you’ve downloaded a Lightroom preset as a file.
The basic process is:
DNG Preset → Open in Lightroom → Copy Settings → Open Your Photo → Paste Settings
You can use the same method with other DNG presets as well.
And if a preset looks too strong after you apply it, don’t assume it’s unusable. Try making small changes to exposure, contrast, saturation, or other relevant controls.Sometimes a couple of small tweaks are all it takes to make the result feel much more natural.
How to Apply the Preset to Your Own Photo
Once the preset is applied, take a moment to check the image before exporting it.
Pay attention to:
- Face brightness
- Skin tone
- Background color
- Overall exposure
- Highlights
- Shadows
- Contrast
- Clothing colors
- Image sharpness
- Overall color balance
If everything looks right, export the image.If something feels off, make a few manual changes first.That extra check can be the difference between an obvious preset effect and a cleaner, more polished edit.
How to Adjust a Preset for the Perfect Result
A preset won’t behave exactly the same way on every image.
One photo might be taken outside in strong sunlight, while another might be shot indoors under artificial lighting. Using identical settings on both can lead to very different results.Here are a few common adjustments you can make.
If the Photo Looks Too Bright
Open the Light section and slightly lower Exposure or Highlights.Avoid making a large change in one move. Adjust the slider gradually and keep an eye on the photo.
If the Photo Looks Too Dark
Increase Exposure a little.You can also raise Shadows when the darker areas have lost too much detail.
If the Skin Looks Too Orange
Go to the Color section and open the Color Mix controls.For many portraits, the Orange channel is especially important.Try lowering its saturation a little or adjusting its luminance until the skin tone looks more natural.
If the Colors Look Too Strong
Lower the overall Saturation or use Vibrance more carefully.A strong preset can sometimes make clothing and background colors look much more intense than they should.
If the Photo Looks Flat
A small increase in Contrast or Clarity can bring back some definition.Be careful with Clarity on portraits, though. Too much can make skin texture appear harsh and less natural.
Understanding Important Lightroom Editing Tools
If you want to get better at photo editing, understanding the main Lightroom controls will help far more than simply collecting presets.
- Exposure: Controls the overall brightness of the image. Raise it when the photo is too dark and lower it when the image is overexposed.
- Contrast: Changes the difference between the lighter and darker parts of the image. Higher contrast gives the photo a stronger look, while lower contrast creates a softer feel.
- Highlights: Controls the brighter areas of the photo. Lowering highlights can help recover details in bright skies or heavily lit areas.
- Shadows: Affects the darker parts of the image. Increasing shadows can reveal details that are difficult to see in dark areas.
- Temperature: Changes the overall warmth or coolness of the photo. Warmer settings create a golden feel, while cooler settings add a bluish tone.
- Texture: Controls the visibility of medium-sized details. It can be useful for clothing, hair, objects, and different types of photography.
- Clarity: Increases the definition of mid-tone details. Use it carefully on portraits because too much can make skin look rough or unnatural.
- Vignette: Changes the brightness around the edges of the photo. It can help draw more attention toward the main subject.
- Grain: Adds a film-like texture to an image. A little grain can create a vintage feel, while too much can make the photo look noisy.
Instagram Viral Santali Profile Photo Editing AI Prompt
Lightroom presets aren’t the only option for creating a creative Santali-style portrait.AI image-editing tools can also transform a reference photo into a stylized portrait.
For example, you can try a prompt like this:
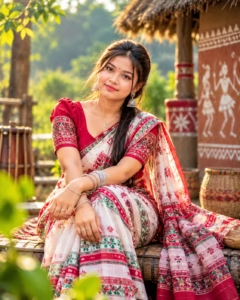
Prompt:
Create an ultra-realistic editorial portrait using the uploaded person’s photo as the primary identity reference. Preserve the person’s facial identity, natural facial proportions, hairstyle, skin texture, and recognizable features. Dress the subject in elegant traditional Santali-inspired clothing and accessories, with authentic-looking details and tasteful styling. Place the subject in a beautiful rural cultural setting with subtle traditional tribal-inspired artistic elements in the background. Use realistic natural lighting, cinematic depth of field, detailed skin texture, realistic fabric details, professional portrait photography, balanced colors, soft background separation, DSLR-quality image, natural shadows, high detail, and a premium social-media portrait aesthetic. Keep the result photorealistic rather than cartoonish or CGI-looking.
You can change the clothing, background, lighting, or composition depending on the kind of portrait you want to create.
How to Get and Use Lightroom Presets
When you download a Lightroom preset from a website, start by checking which file format it uses.For the mobile DNG workflow, presets are commonly shared as .DNG files.
After downloading one:
- Save the file to your phone.
- Open Lightroom.
- Import the DNG file.
- Open the DNG inside Lightroom.
- Use Copy Settings.
- Open your own photograph.
- Choose Paste Settings.
- Adjust exposure and colors if needed.
- Export the finished image.
It’s also a good idea to download preset files only from sources you trust, especially if a site asks you to install an unfamiliar app or file.
Tips for Getting Better Results With Lightroom Presets
Presets can save a lot of time, but the final result still depends on how you use them.
Use Good Original Photos
Start with a reasonably sharp photo that has decent lighting.A preset can’t completely repair a low-resolution or heavily blurred image.
Don’t Overdo the Editing
The most dramatic edit isn’t necessarily the best-looking one.If the skin turns orange, the sky becomes unnaturally blue, or the shadows become nearly black, lower the intensity and bring things back into balance.
Match the Preset With the Photo
A bright outdoor photo may work better with a bright or natural preset.A low-light portrait may suit a moodier or more cinematic style.
Make Small Adjustments
After applying a preset, spend another 20–30 seconds checking the exposure and colors.That little bit of extra work can make the finished image feel much more natural and personal.
Keep a Consistent Style
When you’re creating Instagram content, keeping similar colors across several posts can make your profile look more cohesive.You don’t necessarily need to use one exact preset on every photo. Presets from the same style family can work well, with small adjustments based on the individual image.
Frequently Asked Questions
What is a Lightroom preset?
A Lightroom preset is a saved collection of editing adjustments that you can apply to a photograph quickly.
Can I use Lightroom presets on mobile?
Yes. Lightroom mobile supports preset-based editing, and DNG files are commonly used in mobile preset workflows.
Are Lightroom presets free?
Some presets are free, while others are paid. Check the source and its license before downloading, using, or sharing preset files.
Do presets edit a photo automatically?
A preset automatically applies its saved editing settings, but you may still need to make manual adjustments because every photo has different lighting and colors.
Why does my photo look different after applying the same preset?
The original lighting, camera, exposure, skin tone, background, and colors all affect the final result. The same preset won’t necessarily produce an identical look on every image.
Can I use Lightroom presets for Instagram photos?
Yes. Presets are often used to create a consistent color style across social-media photos.
What is a DNG preset?
A DNG file can include an image together with Lightroom editing information. In the common mobile workflow, you import the DNG, copy its settings, and then paste those settings onto another photo.
Can I create my own Lightroom preset?
Yes. You can manually edit a photo, save those adjustments as a preset, and reuse them on other images.
Conclusion
Lightroom presets are a simple way to speed up a photo-editing workflow.
Lightroom Photo Editing Presets can make everyday photo editing much faster, especially when you want consistent colors and a recognizable style across your images.
Just remember that one preset won’t look exactly the same on every photograph. Lighting, camera settings, skin tone, background, and the original colors all affect the final result. After applying a preset, take a moment to adjust exposure, highlights, shadows, and colors wherever necessary.
Once you’re comfortable with the basic process, you can start creating your own presets and build an editing style that feels consistent across your photos.